> ## Documentation Index
> Fetch the complete documentation index at: https://docs.youware.com/llms.txt
> Use this file to discover all available pages before exploring further.
# Quick Start Guide
> Learn how to create, customize, and publish your first web application with YouWare's AI-powered platform. No coding required - go from idea to live app in minutes.
Just 5-10 minutes to complete this guide
A YouWare account. [Sign up free](https://www.youware.com)
A modern web browser
## Get Started in 3 Steps
Create Your First Project}>
Describe your idea and let AI build it.
Edit & Refine}>
Chat with AI, use visual editing, or edit code directly.
Publish}>
Go live with one click.
## Step 1: Create Your First Project
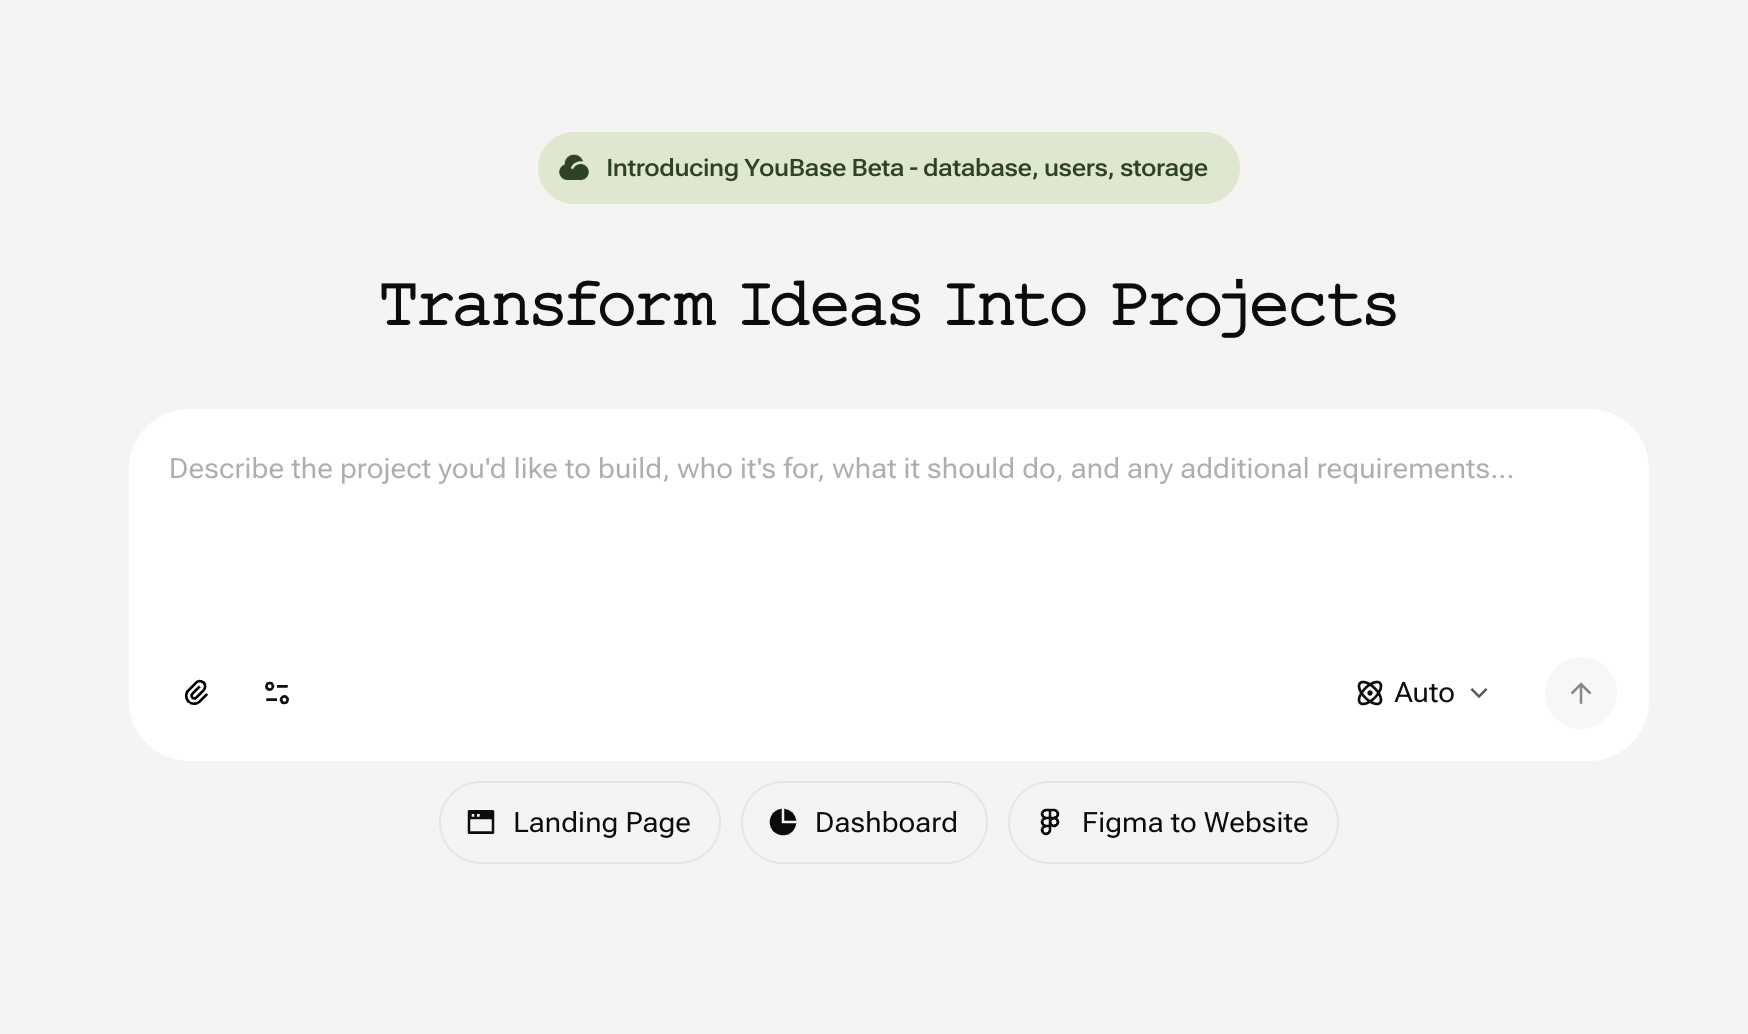
Describe what you want to build in the Creative Command Center.
 **Two Ways to Get Started: Build New or Remix Existing**
Start from scratch with your own idea, or adapt an existing project from the community.
Best for original ideas or when you want full control.
**How to Start:**
1. **Describe your idea clearly in the input box:**
**Tips for Better Results:**
* Be specific about features (e.g., "search functionality," "user login," "image upload")
* Keep descriptions concise and actionable
* Mention key requirements upfront
```text Example Prompts theme={null}
Good: "Create a recipe sharing app with search, user profiles,
and the ability to save favorites"
Too vague: "Make a cooking app"
```
2. **Press "Enter"** or click the generate button
3. **YouWare builds your project** in approximately 30 seconds
Best for rapid prototyping or learning by example.
**How to Start:**
1. Visit the community and browse public projects
2. Open any project page that fits your goal
3. Click **"Remix"** to copy it into your workspace instantly
4. Describe the changes you want
5. YouWare adapts the project to your specifications
```text Remix Examples theme={null}
"Change the color scheme to green and add a login button"
"Replace the hero image with a video background"
"Add a pricing table with three tiers"
```
**Note:** Projects created via Remix cannot be downloaded as source code. They're designed for rapid in-platform iteration and publishing.
## Step 2: Edit & Refine Your Project
Once AI builds your initial project, you have multiple tools to perfect it.
### Chat with AI
**Two Ways to Get Started: Build New or Remix Existing**
Start from scratch with your own idea, or adapt an existing project from the community.
Best for original ideas or when you want full control.
**How to Start:**
1. **Describe your idea clearly in the input box:**
**Tips for Better Results:**
* Be specific about features (e.g., "search functionality," "user login," "image upload")
* Keep descriptions concise and actionable
* Mention key requirements upfront
```text Example Prompts theme={null}
Good: "Create a recipe sharing app with search, user profiles,
and the ability to save favorites"
Too vague: "Make a cooking app"
```
2. **Press "Enter"** or click the generate button
3. **YouWare builds your project** in approximately 30 seconds
Best for rapid prototyping or learning by example.
**How to Start:**
1. Visit the community and browse public projects
2. Open any project page that fits your goal
3. Click **"Remix"** to copy it into your workspace instantly
4. Describe the changes you want
5. YouWare adapts the project to your specifications
```text Remix Examples theme={null}
"Change the color scheme to green and add a login button"
"Replace the hero image with a video background"
"Add a pricing table with three tiers"
```
**Note:** Projects created via Remix cannot be downloaded as source code. They're designed for rapid in-platform iteration and publishing.
## Step 2: Edit & Refine Your Project
Once AI builds your initial project, you have multiple tools to perfect it.
### Chat with AI
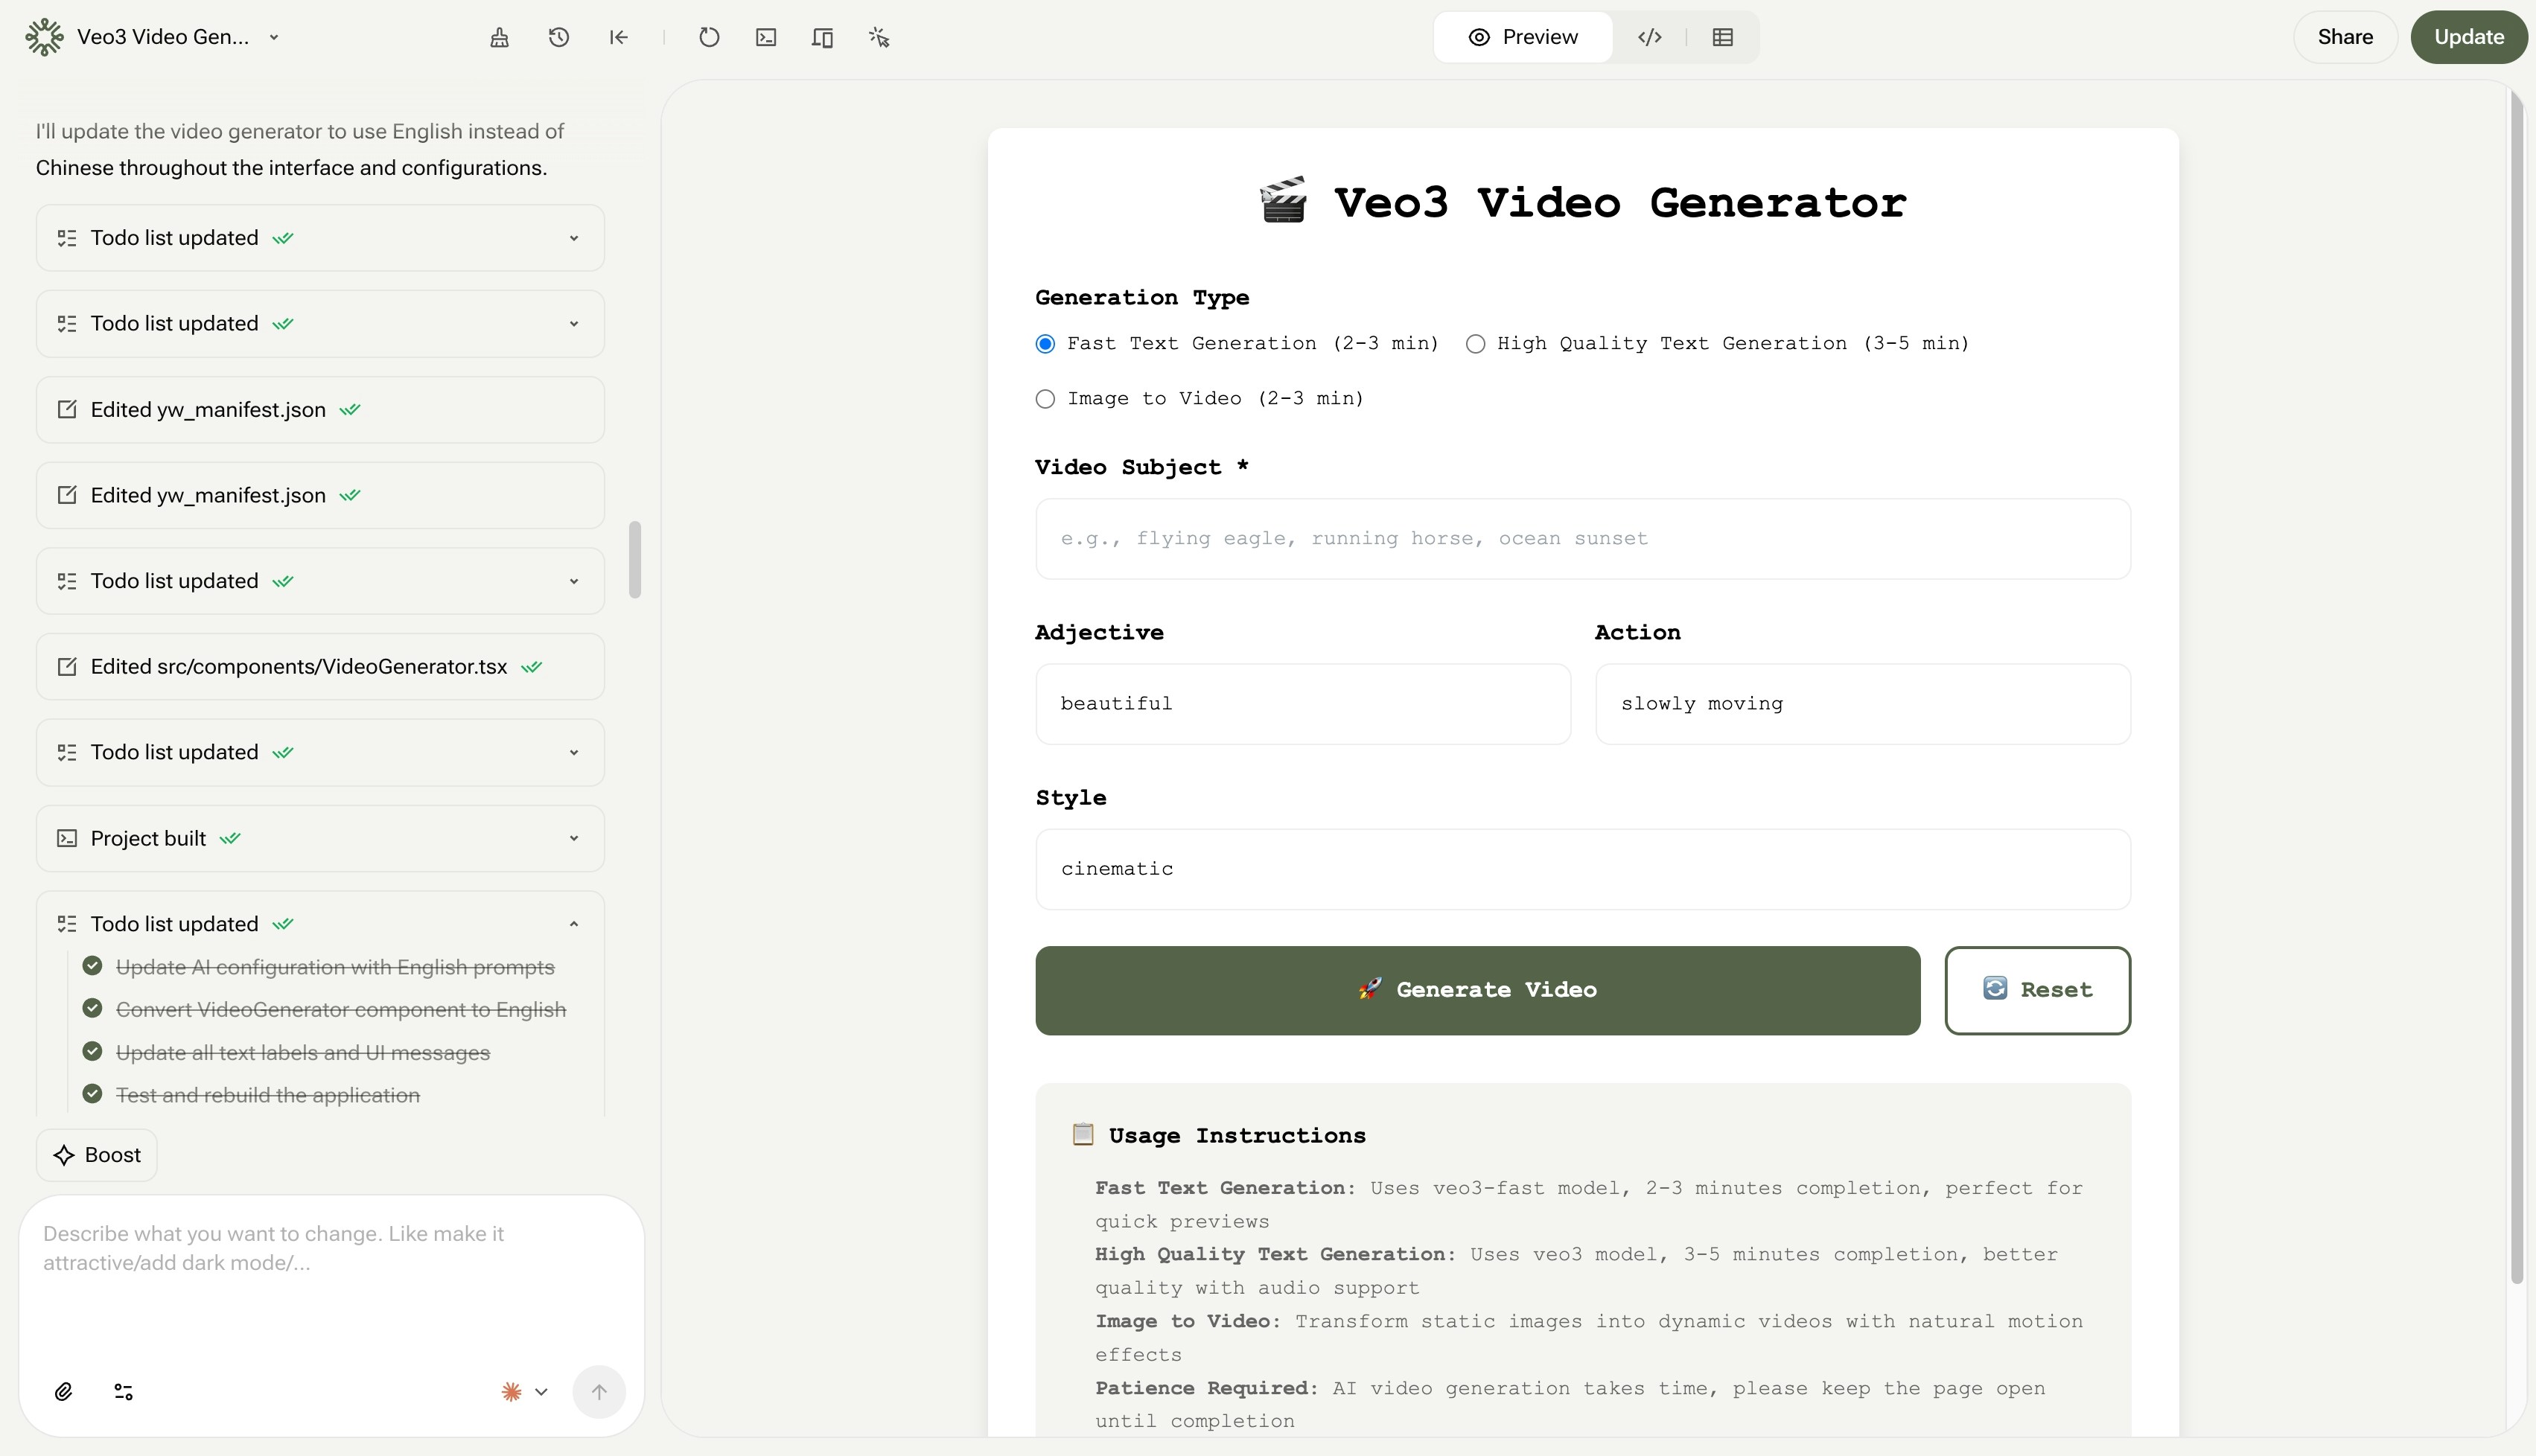 Continue the conversation with AI to make complex changes. The AI remembers your project context and can execute requests instantly.
✅ "Add a dark mode toggle to the header"
✅ "Make the 'Submit' button red and more prominent"
✅ "Connect this form to a new database table called UserFeedback"
### Visual Editing
Continue the conversation with AI to make complex changes. The AI remembers your project context and can execute requests instantly.
✅ "Add a dark mode toggle to the header"
✅ "Make the 'Submit' button red and more prominent"
✅ "Connect this form to a new database table called UserFeedback"
### Visual Editing
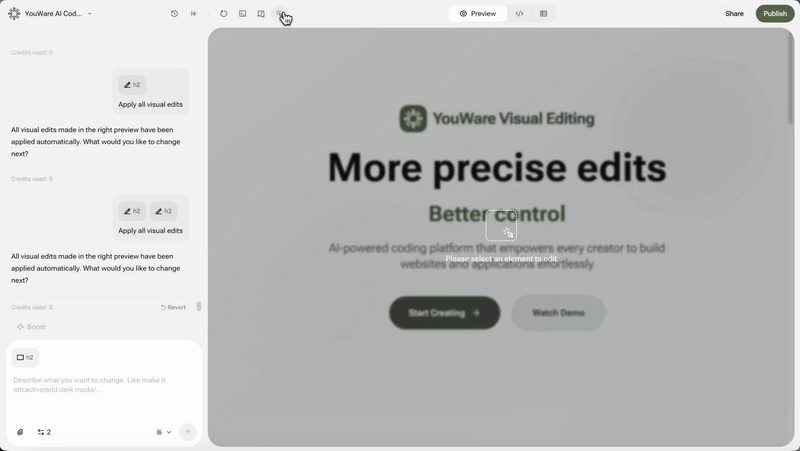 Click any element in the preview to quickly edit text, images, colors, or layout—no coding required.
### Code Editor
Click any element in the preview to quickly edit text, images, colors, or layout—no coding required.
### Code Editor
 For deeper customization, access your project's complete codebase directly.
View all generated files (HTML, CSS, JavaScript) and project structure. All users can inspect the code.
Make changes to any file and see results instantly in the preview. The AI can further refine your manual edits.
Everything you need is in one integrated workspace—no external tools required.
## Step 3: Publish Your Project
Your project is ready to share with the world.
### Go Live in One Click
For deeper customization, access your project's complete codebase directly.
View all generated files (HTML, CSS, JavaScript) and project structure. All users can inspect the code.
Make changes to any file and see results instantly in the preview. The AI can further refine your manual edits.
Everything you need is in one integrated workspace—no external tools required.
## Step 3: Publish Your Project
Your project is ready to share with the world.
### Go Live in One Click
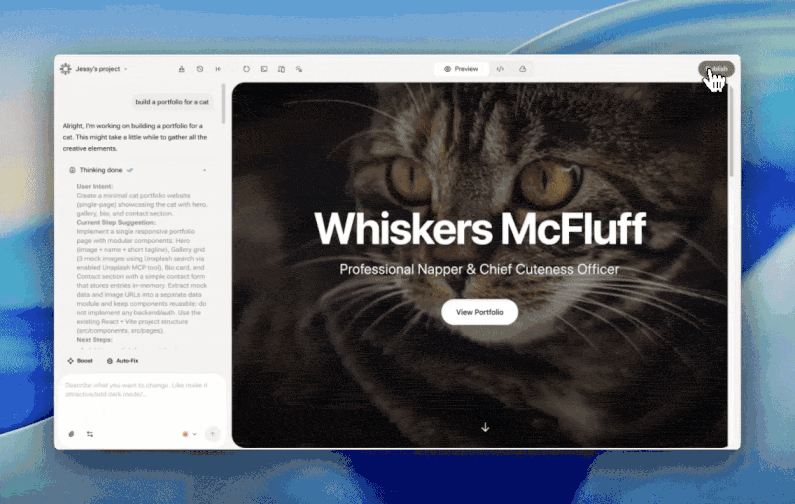 Click the "Publish" button in the top right corner.
YouWare instantly publishes your project and gives you a shareable URL (e.g., abc.youware.app).
Share the link—it's a fully functional web application anyone can use.
### Customize Your Project
Before publishing, you can customize how your project appears:
Change the name that appears in the browser tab
Upload a custom image for the share card
**That's it!** You've built and published your first web app. Ready to build something else?
Click the "Publish" button in the top right corner.
YouWare instantly publishes your project and gives you a shareable URL (e.g., abc.youware.app).
Share the link—it's a fully functional web application anyone can use.
### Customize Your Project
Before publishing, you can customize how your project appears:
Change the name that appears in the browser tab
Upload a custom image for the share card
**That's it!** You've built and published your first web app. Ready to build something else?